InformationEdit
|
Crush the Enemy's Western Frontline Anchorage!
西方敵前線泊地を叩け! | |
 | |
 | |
| Information | |
| Boss gauge (HQ 120) |
Casual: 1700 HP + 1300 HP + 1300 HP Easy: 1700 HP + 1300 HP + 1300 HP Medium: 1800 HP + 1400 HP + 1350 HP Hard: 2000 HP + 1500 HP + 1400 HP |
| Rewards | |
All:
Casual:
Easy:
 1 1 1 1Medium:
11 1 1Hard:
111 1 1 | |
| Branching Rules | ||
|---|---|---|
| Nodes | Rules | |
A |
B |
|
C | ||
E | ||
B |
C |
|
D |
| |
C |
D |
|
F | ||
E |
| |
E |
F |
|
H | ||
F |
I |
|
J | ||
H |
G |
|
J |
| |
J |
K |
|
L | ||
M | ||
I |
N |
|
O |
| |
N |
O |
|
P |
| |
O |
L |
|
Q |
| |
Historical Fleet: Indian Ocean Raid
DISCLAIMER: Keep in mind that not all of them are 100% confirmed to be historical in-game nor are all of them confirmed to have bonus damage against bosses. Please use the Ships at your own discretion.
- There is also suspicion that for CV(B), you require a specific combination(s) of Equipment to gain Bonus Damage.
Carrier Striking Force (Nagumo):
A fast carrier striking force led by Chūichi Nagumo.
- CV(B): Akagi, Hiryuu, Shoukaku, Souryuu, Zuikaku
- (F)BB(V): Haruna, Hiei, Kirishima, Kongou
- CA(V): Chikuma, Tone
- CL: Abukuma
- DD: Arare, Akigumo, Hamakaze, Isokaze, Kagerou, Kasumi, Shiranui, Tanikaze, Urakaze


Malaya Force (Ozawa)
- CVL: Ryuujou, Suzuya, Kumano
- CA(V): Choukai, Kumano
, Suzuya - CL: Yura
- DD: Amagiri?, Fubuki, Hatsuyuki, Murakumo, Shirayuki


Map Guide
E-3 has 3 phases. 2 LBAS can be used. For new players, this will be the first map that you will use combined fleet. Please read up on how to set up combined fleet before proceeding.
- Phase 1: An installation, Harbour Summer Princess
- You will be using either a single fleet or an surface task force (STF)
- Single Fleet:: Less flexible, but allows you to avoid K . Their main benefits are the cheaper cost, less ship locked, and being able to use vanguard formation; the latter can be useful against the double line Ta-class you will be facing at J due to its evasion boost.
- Surface Task Force: More flexible, but will route to K forcing at least 3 battles prior to boss. You have no access to vanguard formation here but you can rely on your heavier ships and even CLTs (see possible comps below).
- This phase is like a continuation of E-2 Phase 2. Similarly, the boss is an installation escorted by Artillery Imp but this time also escorted by PT Imp Pack. They can be dealt using specific setup but the alternate option is to use LBAS equipped with LBAA or any bombers with at least 6 range focusing on the boss node. This phase will be a lot harder without LBAS, so it is a proper time to invest in obtaining some LBAA.
- Once PT Imp Pack are sunk, it will be similar to E-2. Please refer to E-2's page on how to equip your fleet.
- You will be using either a single fleet or an surface task force (STF)
- Phase 2: A surface battleship, Anchorage Water Demon with umbrella
- You will be using either a STF or Carrier Task Force (CTF)
- If you use STF during Phase 1, you're likely to use that same fleet here. However, due to the boss' high air power, you're unlikely to utilize artillery spotting without at least a fighter sweep from your LBAS to reduce her air power. Pre-boss nodes can be easier since your main fleet attacks first, more likely to avoid damages to your escorts.
- An alternate option is to use CTF, which you are recommended to use in Phase 3 due to bonus damage from carriers (see below). More carriers can be brought which make achieving AS a more viable option.
- Additionally, using a submarine (viable in STF too) allow you to avoid the boss and Nu-kai attacks as they will attack the submarine, but will not work against boss at LD since her damaged form does not attack submarine. Furthermore, it will not stop her from attacking your escort fleet during 2nd shelling of the combined abyssal fleet.
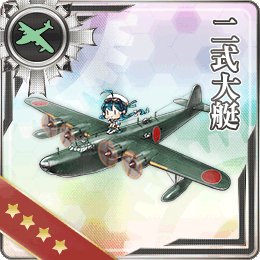
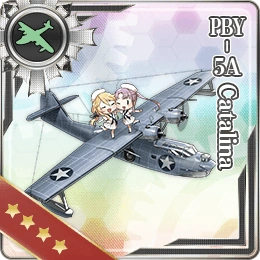
- LBAS: Taitei
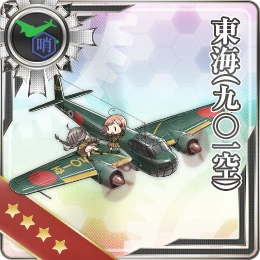
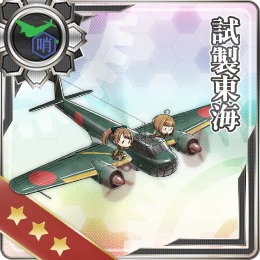
 or Catalina is required in order for your LBAS to reach the boss. It is possible to send the LBAS to node O or C instead, preferably the former. Those with Toukai can send them to I to sink those submarines. Other nodes are also possible if you decide to bring a heavier fleet than suggested.
- You will be using either a STF or Carrier Task Force (CTF)
- Phase 3: A light carrier, Baked Escort Princess but with horn on the left side
- The same node as Phase 2. However, CTF is heavily recommended. Many carriers
have bonus damage against the boss fleet (see below), making them extremely useful. - Bringing a submarine is recommended as the boss will attack the submarine even in LD unlike Phase 2. As above, it will not stop her from attacking your escort fleet during 2nd shelling.
- LBAS: See Phase 2
- The same node as Phase 2. However, CTF is heavily recommended. Many carriers


Phase 3 Bonus against boss
Despite having the best science in the world, the following have been confirmed to have bonuses against the boss:
- These are the few types of bonus multiplier that stacks against the boss:
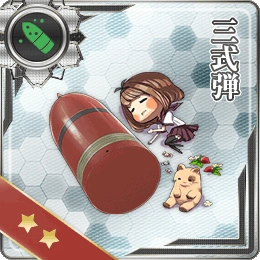
- Type 3 Shell (T3): 1.35x
- Seaplane bombers (SPB) or fighters (SPF): 1.3x
- SPB and SPF will not stack. Pick either of the two.
- 1 Dive bombers: 1.4x
- 2 Dive bombers: 2.1x(?)
- Historicals ships: 1.2x
- Historical CA/BB:
- Historical CV:
- Type 3 Shell


Compositions
Do note that this is not the optimal composition, but it is viable and reaches the boss with shortest route.
- Phase 1: A C F J M (single fleet) and A C F J K M (STF)
- Single Fleet: 1 FBB 1 CV 1 CAV 3 DD or 1 FBB 1-2 CV 1-2 CAV 2DD
- Combined Fleet (STF): 2 FBB 1 CAV 1 CV 2 DD + 1 CL 2 DD 2 CLT 1 CAV
- Phase 2: A C F I O Q
- Combined Fleet (STF): 2 FBB 3 CA(V) 1 CV + 1 CL 2 DD 1-2 CA 2-1 CLT
- Combined Fleet (CTF): 3 CV 2 CAV 1 SS(V) + 1 CL 2 DD 1-2 CA(V) 1-2 CLT 0-1 Night Attack CVL
- CVL does not need to be capable of attacking at night if you wish to bring her for more air power. Additionally, you can also bring something CA(V) or CLT instead.
- Phase 3: A C F I O Q
- Combined Fleet (CTF): 3 CV 2 CAV 1 SS(V) + 1 CL 2 DD 1-2 CA(V) 1-2 CLT 0-1 Night Attack CVL
- Regarding CVL, as Phase 2.
- Combined Fleet (CTF): 3 CV 2 CAV 1 SS(V) + 1 CL 2 DD 1-2 CA(V) 1-2 CLT 0-1 Night Attack CVL
Tips
- Node H Transport,EXP grinding for DD/CL, and LBAS proficiency leveling (mainly for Easy players)
- Working Compositions: 1 CL 4 DD, 4 DD
- According to the branching rule, you must bring exactly 4 DDs and are only allowed 5 ships with the final one mainly being CL(?). The branching rule there is still under testing.
- The general idea is to use your LBAS, which should be full bomber with at least 5 range and target both two at H. This gives 204-240 base EXP.
- Pros:
- Easier transport ship farming than E-1.
- 0 morale farming is possible while gaining some EXP since LBAS should sink almost every ship.
- You can increase your LBAS proficiency here, but adding in interceptor can hurt your chance of sinking the enemy.
- Nothing to shoot down your LBAS planes. Low bauxite cost
- Cons:
- Sortieing LBAS consumes fuel and ammo (216 Fuel and 96 ammo per sortie for 2 full set of attack aircraft)
- Limited amount of ships allowed.
- LBAS can still fail with more chance at higher difficulty than easy.
- Still lower base-exp than the old 2-4A
- Extremely tedious

Friend Fleets
E-3, Phase 2, Q, E-3, Phase 3, Q
| Ship | Lv. | Equipment | |||||
|---|---|---|---|---|---|---|---|
| 84 |    |
33 | 69 | 89 | 64 | 53 | |
| 80 |  |
32 | 51 | 80 | 50 | 49 | |
| 78 | |
32 | 50 | 81 | 50 | 49 |


Map Progression
")
")
")
LBAS Flight Range

If in doubt, use tooltips to check sample sizes.
Enemy patterns

Lua error in package.lua at line 80: module 'Module:Collection/EnemyShips' not found. Lua error in package.lua at line 80: module 'Module:Collection/EnemyShips' not found. Lua error in package.lua at line 80: module 'Module:Collection/EnemyShips' not found. Lua error in package.lua at line 80: module 'Module:Collection/EnemyShips' not found. Lua error in package.lua at line 80: module 'Module:Collection/EnemyShips' not found. Lua error in package.lua at line 80: module 'Module:Collection/EnemyShips' not found. Lua error in package.lua at line 80: module 'Module:Collection/EnemyShips' not found. Lua error in package.lua at line 80: module 'Module:Collection/EnemyShips' not found. Lua error in package.lua at line 80: module 'Module:Collection/EnemyShips' not found. Lua error in package.lua at line 80: module 'Module:Collection/EnemyShips' not found. Lua error in package.lua at line 80: module 'Module:Collection/EnemyShips' not found. Lua error in package.lua at line 80: module 'Module:Collection/EnemyShips' not found. Lua error in package.lua at line 80: module 'Module:Collection/EnemyShips' not found.
Lua error in package.lua at line 80: module 'Module:Collection/EnemyShips' not found. Lua error in package.lua at line 80: module 'Module:Collection/EnemyShips' not found. Lua error in package.lua at line 80: module 'Module:Collection/EnemyShips' not found. Lua error in package.lua at line 80: module 'Module:Collection/EnemyShips' not found. Lua error in package.lua at line 80: module 'Module:Collection/EnemyShips' not found. Lua error in package.lua at line 80: module 'Module:Collection/EnemyShips' not found. Lua error in package.lua at line 80: module 'Module:Collection/EnemyShips' not found. Lua error in package.lua at line 80: module 'Module:Collection/EnemyShips' not found. Lua error in package.lua at line 80: module 'Module:Collection/EnemyShips' not found. Lua error in package.lua at line 80: module 'Module:Collection/EnemyShips' not found. Lua error in package.lua at line 80: module 'Module:Collection/EnemyShips' not found. Lua error in package.lua at line 80: module 'Module:Collection/EnemyShips' not found. Lua error in package.lua at line 80: module 'Module:Collection/EnemyShips' not found.
Lua error in package.lua at line 80: module 'Module:Collection/EnemyShips' not found. Lua error in package.lua at line 80: module 'Module:Collection/EnemyShips' not found. Lua error in package.lua at line 80: module 'Module:Collection/EnemyShips' not found. Lua error in package.lua at line 80: module 'Module:Collection/EnemyShips' not found. Lua error in package.lua at line 80: module 'Module:Collection/EnemyShips' not found. Lua error in package.lua at line 80: module 'Module:Collection/EnemyShips' not found. Lua error in package.lua at line 80: module 'Module:Collection/EnemyShips' not found. Lua error in package.lua at line 80: module 'Module:Collection/EnemyShips' not found. Lua error in package.lua at line 80: module 'Module:Collection/EnemyShips' not found. Lua error in package.lua at line 80: module 'Module:Collection/EnemyShips' not found. Lua error in package.lua at line 80: module 'Module:Collection/EnemyShips' not found. Lua error in package.lua at line 80: module 'Module:Collection/EnemyShips' not found.
Lua error in package.lua at line 80: module 'Module:Collection/EnemyShips' not found. Lua error in package.lua at line 80: module 'Module:Collection/EnemyShips' not found. Lua error in package.lua at line 80: module 'Module:Collection/EnemyShips' not found. Lua error in package.lua at line 80: module 'Module:Collection/EnemyShips' not found. Lua error in package.lua at line 80: module 'Module:Collection/EnemyShips' not found. Lua error in package.lua at line 80: module 'Module:Collection/EnemyShips' not found. Lua error in package.lua at line 80: module 'Module:Collection/EnemyShips' not found. Lua error in package.lua at line 80: module 'Module:Collection/EnemyShips' not found. Lua error in package.lua at line 80: module 'Module:Collection/EnemyShips' not found. Lua error in package.lua at line 80: module 'Module:Collection/EnemyShips' not found. Lua error in package.lua at line 80: module 'Module:Collection/EnemyShips' not found. Lua error in package.lua at line 80: module 'Module:Collection/EnemyShips' not found.