This system is made for Akashi and Akashi Kai, if you have her as your secretary ship, you will be able to use the Improvement Arsenal.
By using Improvement Materials, Development Materials and resources, equipment can be improved and upgraded into a better equipment. Equipment that can be improved depend on the day of the week and the ship in the second slot.
How to Enter[]
- Set Akashi or Akashi Kai as your secretary (first ship of the first fleet).
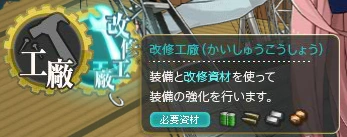
- At the home screen, hover your mouse cursor over the factory icon (do not click).
- The Improvement Arsenal Icon will appear next to it as shown on the right.
- Move your cursor to that icon and click.


Alternatively (as of 22nd December 2016 Game Update) you can now access Akashi's Improvement Arsenal by clicking on the crane (on the left).
- You still will need to have Akashi or Akashi Kai as your secretary (first ship of the first fleet).
How to Use[]
")
")
- To use this arsenal, you need Improvement Materials (
 ), as well as Development Materials () and resources.
 - The 2nd ship of the fleet can aid Akashi and influence the possible improvement and upgrade options.
- There is a chance to fail when doing improvements and upgrades
- If the improvement level is low, then you will have a higher chance of success, and vice versa.
- Akashi Kai has a higher success rate than Akashi herself according to the official twitter.
- Exact level of Akashi and 2nd ship's effect or non-effect on success rate are to be investigated.
- On failure, resources, Development Materials, Improvement Materials and any extra equipment used will be lost. Equipment being improved or upgraded is left unchanged.
- There is a slider for guaranteed success, it increases the required Development Materials and Improvement Materials.
- Equipment that has been improved will have a ★ beside them. Improvement ranges from ★+1 to ★+10. ★+10 appears as ★max.
- Starting from ★+6, you will have to spend a certain amount of some equipment in order to gain ★+7 up to ★+10.
- Equipment to be spent must be unlocked and unimproved.
- Some equipment consume other equipment starting from the first improvement.
- Upgrades always consume equipment.
- As equipment is spent even on failure, using the guaranteed success slider for consumed equipment that is difficult to obtain may be considered.
- If the equipment reaches the maximum improvement level (★max), it may be possible to upgrade to a stronger variant. Any lock on the equipment must be removed, and an upgrade must exist for this to be possible. Be aware that the improvement level will be reset if you do this, and a ★+10 equipment could be stronger than an unimproved upgrade.
- Equipment in particular to take note of before upgrading are: Type 91 AP Shell (because Type 1 AP Shell upgrades are extremely expensive; a ★+9 T91 AP shell is of similar power to a T1 ★+4 AP shell and costs a lot less); Searchlight (because the Type 96 150cm Searchlight it upgrades to cannot be equipped on anything but Battleships). Do not make these upgrades without careful consideration.
- If the new equipment produced after upgrading is something you can develop from the conventional development, the improvement level will be automatically reset to ★+3.
- ★+5 for some equipment.
- With an exception of the 15.2cm Single Gun Mount → 15.2cm Twin Gun Mount upgrade.
- Also, 38cm Twin Gun Mount upgrades to 38cm Twin Gun Mount Kai ★+3, and 381mm/50 Triple Gun Mount to 381mm/50 Triple Gun Mount Kai ★+3 (all unbuildable).
- This has the highest chance of failure, so using the guaranteed success slider can be considered.
- Equipment to be upgraded must not be locked.
Improvement Success Rate without 'Guaranteed Success'[]

- In general, Akashi Kai give higher success rate than unremodeled Akashi.
- Improving low-★ equipment have higher success rate than improving high-★ equipment.
- Improving ★+0~3 equipment with unremodeled Akashi and ★+0~4 equipment with Akashi Kai would have 100% success rate even without sliding the guaranteed success slider.
- After that the rate is decreasing by around 6% per each ★.
| Data on improvement rates[1] (95% confidence) | ||||||
|---|---|---|---|---|---|---|
| ★ | Akashi | Akashi Kai | ||||
| Success | Tries | Success Rate | Success | Tries | Success Rate | |
| 0 → 1 | 695 | 695 | 100.00% ± 0.07% | 2481 | 2481 | 100.00% ± 0.02% |
| 1 → 2 | 515 | 515 | 100.00% ± 0.10% | 2299 | 2299 | 100.00% ± 0.02% |
| 2 → 3 | 449 | 449 | 100.00% ± 0.11% | 2169 | 2169 | 100.00% ± 0.02% |
| 3 → 4 | 377 | 377 | 100.00% ± 0.13% | 2099 | 2099 | 100.00% ± 0.02% |
| 4 → 5 | 337 | 356 | 94.66% ± 2.48% | 1980 | 1980 | 100.00% ± 0.03% |
| 5 → 6 | 313 | 345 | 90.72% ± 3.21% | 1940 | 2031 | 95.52% ± 0.92% |
| 6 → 7 | 127 | 157 | 80.89% ± 6.47% | 927 | 1027 | 90.26% ± 1.86% |
| 7 → 8 | 102 | 132 | 77.27% ± 7.53% | 750 | 911 | 82.33% ± 2.53% |
| 8 → 9 | 90 | 115 | 78.26% ± 7.97% | 602 | 763 | 78.90% ± 2.96% |
| 9 → 10 | 67 | 116 | 57.76% ± 9.42% | 468 | 712 | 65.73% ± 3.56% |
| 10 → Upgrade | 36 | 73 | 49.32% ± 12.15% | 194 | 312 | 62.18% ± 5.54% |
Effects[]
- Main article: Improvements
There are no visible stat differences between non-improved and improved equipment, all bonus effects from improvements are hidden. Read the main article for further details.
However, some equipments give additional visible bonus stats if they are improved to certain thresholds. Refer to Equipment Bonuses to see for which equipments this is the case.
Trivia[]
")
")
- Akashi is animated on the Improvement Arsenal screen, blinking her eyes and occasionally looking towards the options on the left.
- She also has two separate sprites for her basic and Kai forms, reflecting her headband and heftier rigging.